Planer
How Can a Router Plane be Sharpened?
If you are a woodworker who specializes in joinery works or projects that mostly involve this discipline, then you must have a router plane in your arsenal. And while it is an important woodworking tool kit, a router plane can be a bit difficult to sharpen, especially if yours features the old-fashioned integral blades.
If you’re lucky enough to have the modern router plane version, then you can detach the blades and place them in a honing guide. Meanwhile, the old-fashioned blades are made using a single robust metal piece.
Having said that here is a comprehensive guide on how you can sharpen your router plane, despite its design:
Tools Needed to Sharpen a Router Plane
There are several techniques you can employ to refine your router plane’s blade, but these are the most preferred tools for the task:
Lubricant & Sharpening Stones
This category comes with a wide variety of options, including ceramic stones, diamond stones, and waterstones. If it’s your first time sharpening a router plane, I recommend the “scary sharp” sandpaper.
Honing Compound & Strop
To polish the last edge, you have to use the strop. It delivers an incredible sharpness that makes all the difference.
Honing Guide
The honing guide, in conjunction with the blade holder, holds the blade at a specific angle to guarantee accurate and recurrent sharpening.
Blade Holder
This handy yet simple extension accommodates the blades, allowing you to lock them to your honing guide for precise sharpening.
Guide on How to Sharpen a Router Plane
As pointed out, there are multiple ways to sharpen a router plane, but this is how I go about it most of the time. It’s almost the same as sharpening your chisel, and once you understand the basic sharpening principles, you will have great results.
Remove the Router Plane Blade
There are different planes, with each having a unique mechanism for grasping the blade.
Some have a fixed blade attached to the bar and, therefore, cannot be detached. For such router planes, you can only sharpen them using the freehand sharpening method. Moreover, you will need to relocate to the edge of your workbench to refine the blade’s top.
When it comes to other router planes, you can remove the blade by undoing the screw. These are easier to hone, particularly if you have a blade holder. For the next step, you’ll have to prepare your strops and stones.
Begin with Blade’s Rear
Position the blade’s bottom evenly on a medium grit sharpening stone, and make sure the stone is lubricated.
Put pressure on the sharp side, and also ensure it is flat, then gradually move the blade backward and forward.
Note: Only move it back if you’re using the scary sharp setup to avoid ripping the paper.
The process is much more convenient when using a blade holder, so, if possible, get one. Refine it until you feel a bur on the upper part of the sharp edge. This is a tiny steel wire you can feel using your fingernails or fingertips.
The moment the bur has formed on the cutting edge, you can go ahead to the next step.
Refine the Bevel
Now it’s time to put more effort into the upper, beveled section of your blade.
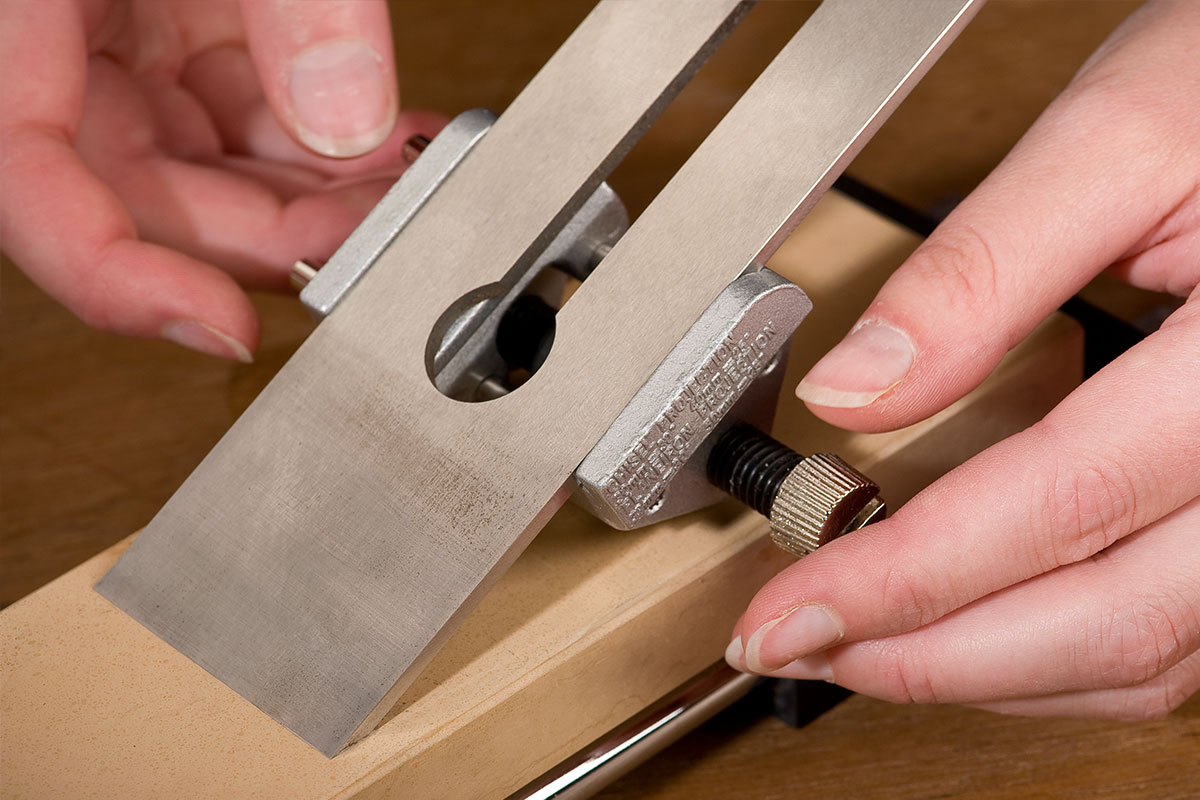
Position the blade holder in the honing guide such that the blade’s bevel sits flat on the sharpening stone. Next, move it a bit, letting the tip come into contact with the stone; ensure it’s properly aligned and lock it in place.
For beveled blades, you’ll require a honing guide that can ideally accommodate blades at a specific angle. Place it so one side of your blade is flat on the sharpening stone, then work on the other side.
Begin with several back strokes, only applying pressure on your blade. Now, start moving it back & forth on the sharpening stone until, like in the previous step, you can feel the burn, but now at the blade’s bottom edge.
So, what should you do if you’re honing your blade freehand?
Position the blade evenly on the stone, then pull up the back marginally and remain in that position. Now, adapting a smoothy rhythmic motion, move the edge back & forth over the sharpening stone.
The aim is to uphold a consistent angle. But provided you feel the bur throughout the bottom section of the blade, you’re doing good.
Do the Same on High Grit Sharpening Stones
Here, you will repeat steps 1 to 3 but on high-grit stones. Work on the bottom until the bur forms on the angled edge, then turn it over and sharpen the bevel until another bur appears.
Now, you can pick any high grit, though 2 to 3 grits will get the job done. As you may have deduced, the higher the grit of the sharpening stone, the sharper the edge you will achieve.
Strop
This is the last step to achieving a sharp and well-polished router plane blade. Moreover, it involves eliminating all the remaining bur.
Pour a small amount of honing compound over the strop, then put the lower part of the blade on it. Move it backward with a small amount of pressure, about 25 times.
Then move to the bevel section, and let it lie evenly on your strop. Raise the back slightly, and move it back towards you 20 to 25 times. Keep in mind that it’s important to put slight pressure on the blade.
Now get back to the bottom section and stroke it 10 times, then 10 more strokes to the beveled section. By now, you ought to have a finely sharpened router plane blade. To be sure, test it on a piece of paper, and if you don’t like the results, sharpen it once or twice more on the stones.
If it’s your first time sharpening your router plane blade, you might feel frustrated and intimidated, but don’t despair; it takes some practice and time, and eventually, you’ll get it.
That’s it! Your router plane is now ready to do some joinery work, with the blade sharper than ever before.
Why You Should Trust Us
At Woodworking Tool Guide, we know one size doesn’t fit all! We cater to every woodworker, from beginner to pro, with insights and recommendations tailored to your skill level, project needs, and budget. We take the guesswork out of choosing the right tools, whether you’re tackling your first crafting a masterpiece for the ages. So grab your chisel, join our community, and let’s build something amazing together!
Woodworking Tool Guide wasn’t just born, it sprouted from a seed of passion for the craft. What started as a joyful exploration blossomed into a trusted online haven for fellow enthusiasts like you. We pour our love into meticulously chosen review selections, meticulous hands-on testing, and lab-backed insights, all to empower you with reliable, comprehensive information you can build on. So, grab your tools, trust our guidance, and let’s build something beautiful together!
Passion-Driven Expertise
Our journey started with a shared love for woodworking. The team behind the Woodworking Tool Guide is comprised of individuals who are not just writers but passionate woodworkers themselves. This shared enthusiasm ensures that our content is crafted with a deep understanding of the craft and an authentic appreciation for quality tools.
Top Tool Guides Online
Woodworking Tool Guide has rapidly ascended to become one of the premier online destinations for tool guidance. Our commitment to excellence and the accuracy of our information has positioned us as a reliable source for both beginners and seasoned woodworkers seeking trustworthy advice on the best tools for their projects.
User-Centric Approach
Our content caters to every woodworker, from rookies just starting out to seasoned pros tackling intricate projects. We tailor our insights and recommendations to your skill level, project needs, and budget, ensuring you find the perfect tools to match your unique woodworking journey. So step into your workshop, grab your tool belt, and let Woodworking Tool Guide be your trusted companion as you craft your masterpieces.
Continuous Support and Innovation
Woodworking is an ever-evolving craft, and so is our commitment to supporting you. We are dedicated to bringing you the latest information on woodworking tools, techniques, and trends. Our team is actively working to expand our content and bring you more valuable insights, ensuring that you stay well-informed in your woodworking adventure.
Hands-On Experience
Ditch the endless research rabbit hole! At Woodworking Tool Guide, we believe in actionable advice, not armchair analysis. We get our hands dirty, putting every tool through its paces in real-world woodworking scenarios. Whether it’s the precision of a table saw, the versatility of a router, or the tactile satisfaction of a handplane, we test for performance, durability, and user-friendliness. No more sifting through dry specs – we deliver practical insights you can trust to transform your woodworking dreams into reality.
Woodworking Tool Guide isn’t just a review site, it’s your trusted companion on the sawdust-filled path to woodworking mastery. Our expert team, led by veteran David Jones, meticulously tests and explains tools in terms you understand. We cut through the jargon, bias, and confusion with real-world insights and honest evaluations. Join our passionate community, where decades of experience, cutting-edge knowledge, and shared love for the craft come together to guide you every step of the way. So grab your chisel, buckle up, and let’s embark on this exciting woodworking adventure, together!
In Conclusion
Like all cutting tools for woodworking, it is important to have a router plane that’s adequately sharp and ready to do some work! Your router plane’s blade makes a huge difference in terms of the cuts’ quality, and the sharper it is, the more quality cuts it will make!
By the time you’re done reading this guide, you will be able to sharpen your router plane, and if you’ve not grasped the concept entirely, you can always come back and re-read this guide.