Woodworking
Removing Dents from Your DIYs Projects

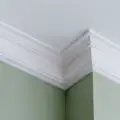
So, you’ve completed your DIY projects but realized there are one or more dents on the wood; fret not, it can be fixed!
Having dents on your workpiece is one of the most common issues woodworkers face. Whether it’s a dent in their new project or previous workpiece, maintaining your workpiece’s integrity is vital.
For this reason, I have included a solution for this stubborn problem. Here is a guide on how to fix and remove dents on your DIY projects that will leave your workpiece looking spotless and as professional as possible.
Prepare the Workpiece
Preparing the workpiece will help achieve excellent results! Here is how to go about it:
Evaluate the dent
You have to check the dent to know its severity. This will help you choose the most suitable technique and tools to use.
Look at the dent and evaluate its location, depth, and size. Also, check how deep or shallow it is, as this will dictate the tools and techniques to use for repairs.
Something else you should look for is chipped paint, splinters, or cracks surrounding the dent. This will be handy in determining if more repairs are required.
Lastly, consider the type of wood finishing the workpiece is made of. Different wood types may call for different dent removal techniques.
Materials Needed
Having weighed in the above factors, it’s time to gather your supplies and tools and then get the job done. Here is what you’ll need:
- Wood filler or putty
- Sandpaper
- Putty knife or spatula
- Steam iron or hair dryer
- Clean fabric
- Varnish or paint
- Sponge or paintbrush
How to Remove Dents from Your DIY Projects
Before you start fixing the dent, it’s vital to clean the surface, as it guarantees a smooth and flawless repair. Follow these steps to do it right:
- Begin by using a microfiber fabric or soft brush to gently clean out all dust and debris from your workpiece. This step is crucial since debris can negatively impact the repair procedure.
- Next, use a wet cloth dipped in wood cleaner or clean water to clean the whole workpiece. This will remove the remaining dust that was left behind in the first step.
- Leave the workpiece to dry before you begin repairing the dent. This guarantees adequate adhesion during repair.
Using Heat & Moisture
To eliminate dents from your DIY projects, use heat & moisture for best results. By utilizing a steam iron or hair dryer on minimum heat, you can effortlessly restore the wood’s initial shape without damaging the workpiece further.
Using a steam iron to apply heat
If you prefer using a steam iron, then this is how to use it right to remove dents from the wood:
- Begin by plugging in your steam iron and setting it to a medium or low heat setting.
- Put a clean fabric over the dent to prevent direct contact between the wood and the iron.
- Gently press the iron over the dent, and move it in a circular pattern for 10 to 15 seconds.
- Lift the cloth and iron to check if you’re making progress. If the dent hasn’t expanded fully, iron it again for another 10 to 15 seconds.
- When the dent expands, lift the fabric and allow the wood to cool down. The dent should lift gently as the fibers of the wood resume their shape.
Softening the Fibers of the Wood by Creating Moisture Using a Wet Cloth
You can also use moisture to soften the fibers of the wood since this makes the dent removal process easier. Here is how to go about it:
- Wet a clean fabric using water and squeeze out excess water.
- Put the wet cloth over the dent, and make sure you cover it entirely.
- Leave it in that position for several hours. This lets the moisture access the wood’s interior structure and softens its fibers.
- Remove it and look at the dent. The fibers of the wood ought to have expanded and turned supple.
- In case the dent hasn’t risen completely, do this again and leave the wet cloth atop it for a few hours.
- When the dent softens, gradually apply pressure using a spoon or towel to level out that section of your workpiece.
Flattening the Dent Using Slight Pressure with a Spoon or Towel
To flatten the surface, you will need either a towel or spoon, then follow the steps below:
- Move the spoon or towel in a round pattern while gently pressing down on the dent.
- Keep applying pressure, but gently, until the dent evens out and reaches the surfaces of the wood.
- If this doesn’t work, you can wet the towel using warm water to boost the efficiency of the pressure.
- Once you level the dent, use a clean fabric to wipe away all moisture and debris left behind.
Restoring the Finish
The next step is restoring the workpiece finish. After removing the dent, it would be best to restore the finish for the workpiece to look great once more.
Dents on wood can be unattractive and make your entire workpiece unappealing. But with this step, I will help direct you through restoring the finish of the workpiece.
In this part, I will talk about the process of returning the wood finish.
There are many steps to getting this done including sanding the wood and using putty or wood filler to blend in the finish. Also, you will do a few final touches such as sealing, staining, and sanding.
Sanding
To start the restoration process, you have to sand the section with a dent. This will be handy in smoothening out the entire workpiece so that you can easily apply putty or wood filler.
You can use 220-grit sandpaper and sand that said section gently. Ensure you sand the wood’s grain for best results. Best sandpaper until the dent flattens to match the surrounding parts.
Make sure to wipe out the debris once you’re done.
Applying Putty or Wood Filler
When you finish sanding the previously dented section, you will have to use putty or wood filler to make the workpiece look good. Apply a small amount of putty or filler on the dent with a spatula or putty knife. Even out the putty or filler and leave it to dry.
Why You Should Trust Us
At Woodworking Tool Guide, we know one size doesn’t fit all! We cater to every woodworker, from beginner to pro, with insights and recommendations tailored to your skill level, project needs, and budget. We take the guesswork out of choosing the right tools, whether you’re tackling your first crafting a masterpiece for the ages. So grab your chisel, join our community, and let’s build something amazing together!
Woodworking Tool Guide wasn’t just born, it sprouted from a seed of passion for the craft. What started as a joyful exploration blossomed into a trusted online haven for fellow enthusiasts like you. We pour our love into meticulously chosen review selections, meticulous hands-on testing, and lab-backed insights, all to empower you with reliable, comprehensive information you can build on. So, grab your tools, trust our guidance, and let’s build something beautiful together!
Passion-Driven Expertise
Our journey started with a shared love for woodworking. The team behind the Woodworking Tool Guide is comprised of individuals who are not just writers but passionate woodworkers themselves. This shared enthusiasm ensures that our content is crafted with a deep understanding of the craft and an authentic appreciation for quality tools.
Top Tool Guides Online
Woodworking Tool Guide has rapidly ascended to become one of the premier online destinations for tool guidance. Our commitment to excellence and the accuracy of our information has positioned us as a reliable source for both beginners and seasoned woodworkers seeking trustworthy advice on the best tools for their projects.
User-Centric Approach
Our content caters to every woodworker, from rookies just starting out to seasoned pros tackling intricate projects. We tailor our insights and recommendations to your skill level, project needs, and budget, ensuring you find the perfect tools to match your unique woodworking journey. So step into your workshop, grab your tool belt, and let Woodworking Tool Guide be your trusted companion as you craft your masterpieces.
Continuous Support and Innovation
Woodworking is an ever-evolving craft, and so is our commitment to supporting you. We are dedicated to bringing you the latest information on woodworking tools, techniques, and trends. Our team is actively working to expand our content and bring you more valuable insights, ensuring that you stay well-informed in your woodworking adventure.
Hands-On Experience
Ditch the endless research rabbit hole! At Woodworking Tool Guide, we believe in actionable advice, not armchair analysis. We get our hands dirty, putting every tool through its paces in real-world woodworking scenarios. Whether it’s the precision of a table saw, the versatility of a router, or the tactile satisfaction of a handplane, we test for performance, durability, and user-friendliness. No more sifting through dry specs – we deliver practical insights you can trust to transform your woodworking dreams into reality.
Woodworking Tool Guide isn’t just a review site, it’s your trusted companion on the sawdust-filled path to woodworking mastery. Our expert team, led by veteran David Jones, meticulously tests and explains tools in terms you understand. We cut through the jargon, bias, and confusion with real-world insights and honest evaluations. Join our passionate community, where decades of experience, cutting-edge knowledge, and shared love for the craft come together to guide you every step of the way. So grab your chisel, buckle up, and let’s embark on this exciting woodworking adventure, together!
Final Touches
Now that you have removed the dent from your workpiece, sanded it, and applied putty or filler to it, it’s time for the final touches. Snad the section to smoothen it out, and once you’re done, wipe away all debris and dust.
If your workpiece wasn’t painted, you can leave it that way, but if it was painted or stained, make sure you apply stain or varnish on that section to enhance the overall appearance.
That’s it! You now have a workpiece that is dent-free and as good as new!