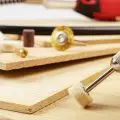
Woodworking
How to Make a Shooting Board for Woodworking
As a woodworker, you understand how important a shooting board can be. It can cut workpieces into perfect squares. Besides, if you have a hand plane, it is imperative to have a shooting board, but this doesn’t necessarily mean that it is meant for woodworkers who use hand tools only.
Shooting boards are also handy in cutting along the marked line with unrivaled precision, whether it is a bevel, miter, or crosscut. They will be beneficial to your garage or woodworking shop, especially if you already have a crosscut guide for your table saw.
Here is a step-by-step guide on how to make a shooting board for woodworking:
What is a Shooting Board?
Before we delve into the construction guide, it’s important to know what a shooting board is, especially for beginner woodworkers.
This is a woodworking tool consisting of several parts, which work in tandem with each other to make it effortless to shave boards precisely. This lets woodworkers establish and follow a more precise mark line, particularly when utilizing less accurate woodworking tools like a hand plane.
This platform features five major parts, and they are:
The Upper Section
This is a flat area ideal for placing your workpiece, as well as a reference edge for the hand plane.
The Lower Section
This part provides support and stability for your hand plane when working.
The Fence
This section is the backer board to help decrease tear-out.
The Key
It holds the fence in position.
The Bench Hook
The bench hook delivers a joiner you can utilize to connect your workbench and shooting board.
How To Make a Shooting Board for Woodworking
This guide is for building a dependable and versatile shooting board, and you can build it within a few hours.
Materials Needed:
- 0.5-inch MDF or Plywood for the upper section.
- 1/8 to ¼ inch MDF or plywood for the lower section.
- Hardwood for the fence or key.
- CA glue and wood glue.
- Mallet
- Screws
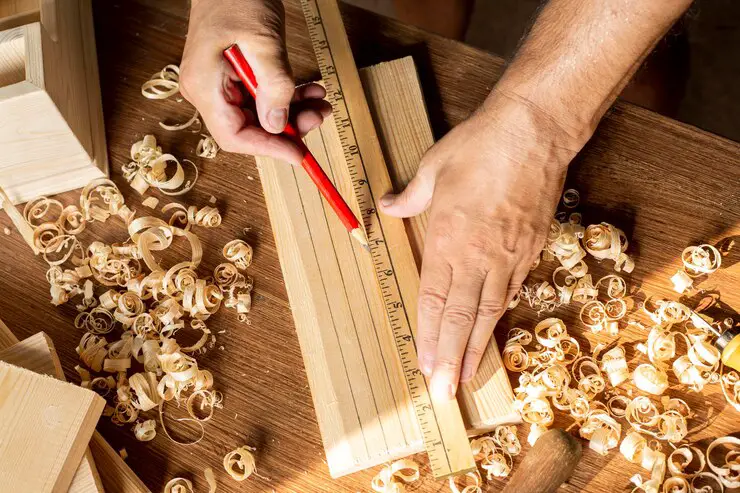
Step One: Cut the Lower and Upper Sections
The upper section’s dimensions will be based on your needs.
The width might not be crucial because shooting boards are utilized for crosscuts. Nevertheless, ensure it is lengthy enough to handle the width of your workpieces.
Next, create the lower section using the same dimensions as the upper base, though several inches wider to hold the hand plane.
Step Two: Mill the Fence
The fence has to have the same length as the upper section’s width. Also, make sure the width is long enough to deliver ample stability.
Remember to make it as broad as the broadness of the workpieces you’ll be using for sufficient support and less tear out.
Step Three: Create Grooves in the Fence and upper Base
Making grooves in boards
Create a groove at the top of the upper section at 90 degrees to the reference edge; it has to be square.
In case you’re using a crosscut sled that’s one-sided, you can position the reference edge beside the fence and drill the groove using a dado stack. On the other hand, if you intend to use a router equipped with an edge guide, ensure the back edge and reference are ideally square.
Establish the groove approximately six inches from the upper base’s rear. While the depth is not vital, at least make sure its thickness is half of that of your workpiece.
Making grooves on the lower base
Here, you will employ a similar router bit or dado stack and drill a groove via the fence’s bottom. Down through the center is okay, though halfway through is too deep.
Drill bits the groove parallel to the fence’s reference edge, as it guarantees your hand plane cuts at 90 degrees.
Step Four: Create the Key
It is imperative for the key to fit completely in the grooves. So, to put it in position, hit it lightly using a mallet.
Measure your grooves’ width using vernier calipers, then take a planer and dial in a wood piece to that width or marginally wider.
When it comes to the height, make it somewhat shorter than the two grooves’ sum of depth. This way, the fence has a lot of space, though it sits on the base.
Step Five: Attach the Pieces using Glue
Begin by attaching the key to the upper section groove using glue. Do not squeeze out the glue; a few drops will do the trick. Next, hit the key slightly, using your mallet to set it in position.
Attaching the Key
Now fix the lower and upper bases together using glue, then drive a few screws for better stability. Nonetheless, ensure no screws reach the top. Even though the two bases don’t have to be square, they need to be flat.
For right-handed woodworkers like me, allow the lower section to protrude past the upper section on the right side. On the other hand, the left-handed woodworkers should do the opposite.
Fix the Bases
Lastly, integrate a bench hook to the lower side where the user will be standing. It needn’t be very large, just spacious enough. Apply some glue and drive a few screws.
Note: Do not glue the fence.
The fence has to be detachable, as this allows you to re-square it and create fences featuring custom angles.
Here are a few pointers:
- Employ a block plane to even out the key’s top edges.
- This helps to ease the process of establishing the fence groove over the edges. Ensure you lock the key in position by lightly hitting it with a mallet.
- Even out the shooting board key’s edges.
Step Six: Finishing
This is the final step, and it mostly covers how to make your shooting board look professional and presentable.
For best results in terms of looks and durability, you should use a cutting board conditioner. You can as well go for beeswax finishing, as it will ensure a smooth surface that your hand plane can slide on.
Why You Should Trust Us
At Woodworking Tool Guide, we know one size doesn’t fit all! We cater to every woodworker, from beginner to pro, with insights and recommendations tailored to your skill level, project needs, and budget. We take the guesswork out of choosing the right tools, whether you’re tackling your first crafting a masterpiece for the ages. So grab your chisel, join our community, and let’s build something amazing together!
Woodworking Tool Guide wasn’t just born, it sprouted from a seed of passion for the craft. What started as a joyful exploration blossomed into a trusted online haven for fellow enthusiasts like you. We pour our love into meticulously chosen review selections, meticulous hands-on testing, and lab-backed insights, all to empower you with reliable, comprehensive information you can build on. So, grab your tools, trust our guidance, and let’s build something beautiful together!
Passion-Driven Expertise
Our journey started with a shared love for woodworking. The team behind the Woodworking Tool Guide is comprised of individuals who are not just writers but passionate woodworkers themselves. This shared enthusiasm ensures that our content is crafted with a deep understanding of the craft and an authentic appreciation for quality tools.
Top Tool Guides Online
Woodworking Tool Guide has rapidly ascended to become one of the premier online destinations for tool guidance. Our commitment to excellence and the accuracy of our information has positioned us as a reliable source for both beginners and seasoned woodworkers seeking trustworthy advice on the best tools for their projects.
User-Centric Approach
Our content caters to every woodworker, from rookies just starting out to seasoned pros tackling intricate projects. We tailor our insights and recommendations to your skill level, project needs, and budget, ensuring you find the perfect tools to match your unique woodworking journey. So step into your workshop, grab your tool belt, and let Woodworking Tool Guide be your trusted companion as you craft your masterpieces.
Continuous Support and Innovation
Woodworking is an ever-evolving craft, and so is our commitment to supporting you. We are dedicated to bringing you the latest information on woodworking tools, techniques, and trends. Our team is actively working to expand our content and bring you more valuable insights, ensuring that you stay well-informed in your woodworking adventure.
Hands-On Experience
Ditch the endless research rabbit hole! At Woodworking Tool Guide, we believe in actionable advice, not armchair analysis. We get our hands dirty, putting every tool through its paces in real-world woodworking scenarios. Whether it’s the precision of a table saw, the versatility of a router, or the tactile satisfaction of a handplane, we test for performance, durability, and user-friendliness. No more sifting through dry specs – we deliver practical insights you can trust to transform your woodworking dreams into reality.
Woodworking Tool Guide isn’t just a review site, it’s your trusted companion on the sawdust-filled path to woodworking mastery. Our expert team, led by veteran David Jones, meticulously tests and explains tools in terms you understand. We cut through the jargon, bias, and confusion with real-world insights and honest evaluations. Join our passionate community, where decades of experience, cutting-edge knowledge, and shared love for the craft come together to guide you every step of the way. So grab your chisel, buckle up, and let’s embark on this exciting woodworking adventure, together!
Conclusion
Well, after following these six steps, you should have a professional-looking shooting board for your woodworking projects.
While it is not commonly used nowadays, a shooting board can be extremely valuable, and it’s a great option to utilize along with a hand plane to smoothen out edges, and other tasks alike. With that said, I strongly advise looking for various ways to utilize your new shooting board for woodworking projects.
Certainly, this platform can be handy to help optimize your woodworking and trimming efforts, giving most of your work a neat and smooth finish.