Power Tools
10 Exceptional Woodworking Tips For Beginners.
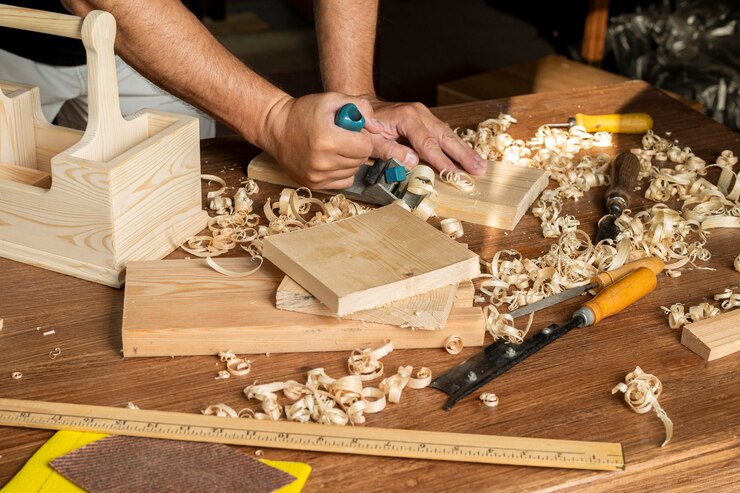
Woodworking is an immersive and incredibly rewarding craft, a hobby that lets you turn your ideas into reality by creating workpieces that are unique, functional, and beautiful. However, starting can be an unnerving undertaking. So, if you are one of those beginners I’m talking about, you will need a few woodworking tips & tricks to get started, which is why I’ve created a list of 10 exceptional woodworking tips for beginners.
Safety Tips
Because safety is the most important factor, I will kick off this article with two safety tips, then proceed to the other tips and tricks for DIYs projects.
Always Wear Safety Gear
Woodworking involves using numerous power tools for drilling, cutting, and hitting, so it is essential to wear the appropriate safety gear. For instance, if you are cutting wood, using a circular, miter, or jigsaw, wood pieces, and other debris can fly across the room and damage your eyes. Hence, it is vital to wear safety goggles to keep your eyes safe.
Don’t forget to also wear a dust mask, especially if you are cutting wood because there will be sawdust all over the room. Unfortunately, sawdust can impact your breathing system, mostly aggravating the lungs and making it hard for you to breathe.
So, make sure you wear protective gear whenever you’re woodworking.
Don’t Carry Extremely Heavy Woodworking Projects
Carrying heavy workpieces like cabinets and heavy chairs isn’t something I would recommend. This is because they could fall, and you’ll end up hurting yourself in the process.
If you have to carry a workpiece, it would be best to break it down into more manageable pieces. This makes it highly portable, adds convenience, and reduces the risk of injury.
Other Tips & Tricks
Here are some more woodworking tips and tricks to use while at home or on the job site:
Jointer Alternative
Don’t have a jointer? No need to panic. You can even establish glue joints on bowed or wavy wood edges, even without a jointer.
Place the wood on an even surface, then use a bar clamp to clamp it at the center. Place a pair of 8 X 1.75” (LXW) boards on each end and screw them using four 1.25” screws. Do not drill the screws close to your cutting line.
Position the table saw fence such that the blade is adjusted at the seam’s center, then push the entire workpiece through the saw. If the edges of the workpiece are slightly curvy or bowed, you may have to pass it through the table saw again.
For the second pass, loosen the cleats, clamp the boards on the seam’s center, and then fasten the cleats once more. The screws might buzz the board’s ends a tad bit, therefore, cut the workpiece marginally longer, then cut 0.5” from either end to detach the screw holes.
Curved Sandpaper
If you have a workpiece that has tricky corners, then you need a different type of sandpaper to get the job done. You might have even attempted to sand the section by taking a sandpaper and holding it yourself, but it didn’t work, or tried to use a sanding block, yet it couldn’t reach the hard-to-access corners.
So, what next? If you want to sand a curved section, then get yourself a curved sandpaper. Take your sandpaper and wrap it across a folded catalog or magazine. This keeps the sandpaper sturdy and lets you effortlessly sand the curvy areas with your innovative sandpaper.
Renewing Crystalized Epoxy
Sometime back, I went to take my epoxy and use it on a project I was working on. However, I saw that it had crystallized because it had been in storage for a long time.
I was about to go to my local hardware store to purchase another bottle of epoxy when a friend of mine recommended I place the crystalized epoxy in a bowl or container with hot water. I left it for about 15 minutes, then poured the water and put more hot water in the container. 30 minutes later, my epoxy was as good as new, with the right consistency.
Easy Angle Alignment
If you are finding it difficult to align and clamp mitered edges, fear not! You can utilize a painter’s tape to do the job. Place the unmanageable edges with the outer area facing upwards.
Utilize the painter’s tape to clutch them edge to edge. Turn them over for easy access to the angled edges, then apply glue to attach them. Lastly, tape the other two edges and let them sit for a short time.
This tape is an excellent way to align beveled edges as it is easily removable, and glue won’t stick on it. Besides, this makes sanding and finishing easier.
Use a Chisel for Trim Edge Banding
As a beginner, you might not know what edge banding is. Also known as iron-edge banding, this is a swift and easy way to conceal plywood’s edges. However, trimming the extra edges is difficult.
I’ve even used edge-banding trimmers, though the end product wasn’t as good. Besides, it is difficult to adjust the cut’s direction according to the edge banding’s grain direction.
For a better experience, use a chisel. Angle it slightly and move gradually as you raise the chisel’s back corner. However, do not raise it too high to avoid interfering with the plywood-veneer. When you’re done, smoothen the corner using a sanding block.
The Poor Man’s Paint Sprayer
If you do not have a paint sprayer or aren’t ready to invest in one yet, you can build your sprayer at home or in the workshop. This sprayer will even spray the tight spaces and tricky corners expensive paint sprayers can’t access.
First, cover your working surface or table using tar or plastic. Then, buy a cheap spray bottle from your local hardware. Pour the stain inside the bottle and spray the tough-to-reach areas.
The paint will reach these trick spots with incredible ease, after which you will use a soft fabric or rag to wipe the spills.
Fix Dents Within a Short While
Nothing besides unprofessional-looking work is more infuriating than dents. Fortunately, there is a way to fix this.
Soak a soft fabric in water and squeeze it out partially so it doesn’t pour out too much water. Place it on the dented section. The water will penetrate the wood, though this won’t be an issue.
Now, take your iron box and put the highest heat setting, then position it atop the wet cloth and make small circular back-and-forth motions. Make sure to press the iron down firmly and make the back-and-forth motions until the fabric is dry.
As you do this, the lumber absorbs hot water and expands to its original size. Check if the dent is gone; if not, pour water on the fabric and continue ironing until the dents rise to an even height with the rest of the wood.
Mixing Station
Finally, I would advise you to create a mixing station. As woodworkers, we have to mix epoxy, wood filler, and even paint many times. When you make the combination in a container, it can be difficult to achieve the perfect mixture.
For the perfect blend, establish a mixing station on your workbench. Take your painter’s tape and apply a few strips on it. Ensure the tape strips are overlapping for a perfectly solid surface, and you are done.
You can use this area to mix your wood filler and epoxy effectively. When you are done mixing, you can pull out the tape from the surface, and fortunately, cleaning up after the fact is easy.
Why You Should Trust Us
At Woodworking Tool Guide, we know one size doesn’t fit all! We cater to every woodworker, from beginner to pro, with insights and recommendations tailored to your skill level, project needs, and budget. We take the guesswork out of choosing the right tools, whether you’re tackling your first crafting a masterpiece for the ages. So grab your chisel, join our community, and let’s build something amazing together!
Woodworking Tool Guide wasn’t just born, it sprouted from a seed of passion for the craft. What started as a joyful exploration blossomed into a trusted online haven for fellow enthusiasts like you. We pour our love into meticulously chosen review selections, meticulous hands-on testing, and lab-backed insights, all to empower you with reliable, comprehensive information you can build on. So, grab your tools, trust our guidance, and let’s build something beautiful together!
Passion-Driven Expertise
Our journey started with a shared love for woodworking. The team behind the Woodworking Tool Guide is comprised of individuals who are not just writers but passionate woodworkers themselves. This shared enthusiasm ensures that our content is crafted with a deep understanding of the craft and an authentic appreciation for quality tools.
Top Tool Guides Online
Woodworking Tool Guide has rapidly ascended to become one of the premier online destinations for tool guidance. Our commitment to excellence and the accuracy of our information has positioned us as a reliable source for both beginners and seasoned woodworkers seeking trustworthy advice on the best tools for their projects.
User-Centric Approach
Our content caters to every woodworker, from rookies just starting out to seasoned pros tackling intricate projects. We tailor our insights and recommendations to your skill level, project needs, and budget, ensuring you find the perfect tools to match your unique woodworking journey. So step into your workshop, grab your tool belt, and let Woodworking Tool Guide be your trusted companion as you craft your masterpieces.
Continuous Support and Innovation
Woodworking is an ever-evolving craft, and so is our commitment to supporting you. We are dedicated to bringing you the latest information on woodworking tools, techniques, and trends. Our team is actively working to expand our content and bring you more valuable insights, ensuring that you stay well-informed in your woodworking adventure.
Hands-On Experience
Ditch the endless research rabbit hole! At Woodworking Tool Guide, we believe in actionable advice, not armchair analysis. We get our hands dirty, putting every tool through its paces in real-world woodworking scenarios. Whether it’s the precision of a table saw, the versatility of a router, or the tactile satisfaction of a handplane, we test for performance, durability, and user-friendliness. No more sifting through dry specs – we deliver practical insights you can trust to transform your woodworking dreams into reality.
Woodworking Tool Guide isn’t just a review site, it’s your trusted companion on the sawdust-filled path to woodworking mastery. Our expert team, led by veteran David Jones, meticulously tests and explains tools in terms you understand. We cut through the jargon, bias, and confusion with real-world insights and honest evaluations. Join our passionate community, where decades of experience, cutting-edge knowledge, and shared love for the craft come together to guide you every step of the way. So grab your chisel, buckle up, and let’s embark on this exciting woodworking adventure, together!
Conclusion
Don’t forget to have fun!
Woodworking doesn’t have to be all frustration. Besides, this is a hobby, and with these woodworking tips and tricks, you are all set to have a less difficult time doing what you love most!
Don’t overthink every aspect of the building process; just go with the flow, learn as you build, and have fun!