Woodworking
How to Cut Crown Molding

There are many varied ways you can cut crown molding, and you must understand how they work. Otherwise, you may compromise on the quality finish you desire. However, it can be pretty challenging as you look to grasp the art of cutting crown mold effectively. Luckily, this is where we come in.
In this post, we’ll be assessing the various methods of cutting molding and the vital cuts for crown molding. But before going into it, herein is a list of the most popular types of crown moldings in the market:
What Are The Different Forms Of Crown Molding?
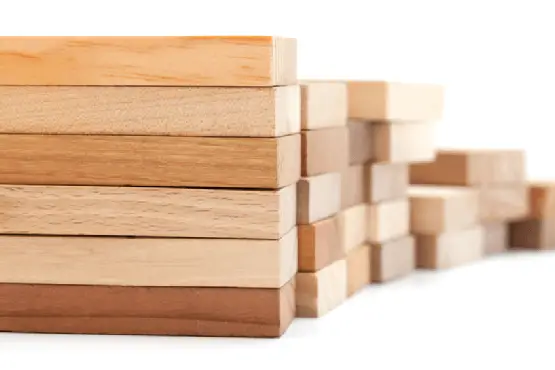
Typically, there are different crown moldings in the market, each with unique qualities to suit different uses. Below is a comprehensive list of different types of crown molding.

Medium-density fiberboard (MDF) molding:
Medium-density fiberboard, referred to as MDF, is among the most common type of crown molding. Ideally, MDFs are produced by mixing resin and sawdust under high pressure. When complete, these crown moldings create high-quality and appealing design pieces that can transform your home or office interior design remarkably.

PVC and Polyurethane Moldings:
PVC and polyurethane crown moldings come in various designs and are common in home sanitary areas, including the bathrooms or toilets. Ideally, these crown moldings comprise a constructive adhesive, a feature that helps them facilitate easy repair. What's more, because they are relatively lightweight, they are pretty easy to cut and use.
The price of PVC moldings usually ranges between $2 and $4 per foot.

Polystyrene molding
Like polyurethane and PVC crown moldings, polystyrene molding is also cost-efficient. This crown molding comprises foam-friendly adhesives, a unique feature, and its overall feel; it compares to the standard foam commonly used in making foam-based mugs and plates.

Plaster crown molding
This type of crown molding is unique and requires expert installation. You'll mostly find plaster crown molding in museum buildings, libraries, cathedrals, government buildings, and in some homes.
To acquire this type of molding and ensure it is installed correctly, you should consult with a professional lumberyard to design your preferred crown molding pattern to suit your preferred pattern and design.
Wood crown molding
This type of crown molding is among the most commonly used forms of artistic décor. Wooden crown moldings come from cutting various types of hardwoods like oak and ash, and walnut. What’s more, this type of crown molding is a simple yet stunning element for a stunning interior design.
What Are The Cuts Necessary For This Process?
Ideally, when dealing with crown moldings, you must understand the basics of what you should do when cutting crown moldings. To start with, you should understand the crucial cuts before you begin cutting your molding. In fact, it would be best if you practiced on spare wood pieces before turning to the actual stock.
Here are the common types of cuts:
Miter Cut
In a simple description, a miter cut represents the most effective cut to perform using a miter saw—would you have guessed? Miter cuts represent angled cuts across the wood's face. Essentially, please think of the cut as one that isn't cut along its width at a right angle (90 degrees).
These cuts are vital in ensuring you make corners called miter joints. It results in two wood pieces cut with a 45-degree angle. Together they create an even corner—a very critical element in the entire crown molding process.
Check out our comparison of our 2 favorite miter saws: Dewalt DWS779 vs DWS780.
A Bevel Cut:
These are cuts on the molding at any other angle besides 90 degrees. Usually, they are done through the wood's thickness.
When performing a bevel cut, you need to fine-tune the miter saw to be suitable for the cuts, as they are done particularly to the wood’s edge.
Cut through the wood's vertical plane to make these cuts since this alters the board’s edge angle.
How to Cut the Crown Molding

Since you’ll work with different types of crown molding, this guide covers the best crown molding cutting methods using your miter saw.
Before starting the cutting process, always wear the crucial protection equipment and ensure you adhere to the necessary precautions when cutting the molding. Moreover, with miter saws, experts recommend cutting it upside down. This is because of the molding's nature since it comprises flat edges attached to your ceiling or walls. It is essential the molding is balanced to allow an easy fit.
Inside Corner:
To make the inside corner, you must cut your crown molding at 45 degrees (whether you cut from the right or left). When cutting the left, turn your miter saw at a 45-degree angle right to save the cut's right end—and vice versa on your right wall side.
Here is a method you should follow when cutting molding for inside corners, and it involves a bevel and miter cut.
The recommended angle for bevel cuts is usually 33.85 degrees, with a slight left. For miter cuts, the best angle to set is 31.62 degrees.
1) Make your cut, and ensure to save the left side of the wood.
2) Flip your crown molding with the bottom facing upwards, ensuring that your wood is flat on your table.
3) Whereas you may maintain these angles to similar degrees, you'll be putting them on the other side. This process is fairly straightforward, as you will follow those mentioned above the first two steps in the other direction.
Note: As you make this cut, you should do it when ensuring to save its left side—since you will utilize this piece on the inner corner's right side.
Outside Corner:
Ideally, this is a method of cutting molding purposely for rooms with more than four corners, necessitating outside cuts.
Here is an outline of how to cut an outside corner:
1) Ensure the bottommost wood part is positioned away from where you are standing while making this cut. This resembles inside cuts (the bevel cuts must is at a 33.85 angle while your miter cut at a 31.62 degree to your left).
2) Cut the molding, saving the cut’s right end that you'll later use on the outer corner to your left.
3) Flip this crown molding and place it that it’s facing away from where you are standing. Use similar degree adjustments; with the right now, the side your miter cut is directed as opposed to the left side.
4) Finally, follow the second step and do the cut (regular cut), saving the cut's right end. This is mainly because you will use this piece on the outside corner's right.
Square Cut:
This is the clearest cut of the mentioned options. It is primarily done to fit that preferred crown molding suitably against a corner wall to create the desired inside décor.
To start, calibrate the miter saw to hit 0 degrees. Although this may be an obvious mention, it is worth following, particularly if you’ve previously adjusted angles for alternate cuts.
This is a relatively simple cut and is particularly vital when a corner is fitted with crown molding and blocks. These corner blocks are usually used as replacements for miter cuts that often come off as tricky and challenging for some.
When trying out this cut, you can use scrap wood pieces when trailing out the cuts. This way, you can ensure that you don’t waste your boards.
Why You Should Trust Us
At Woodworking Tool Guide, we know one size doesn't fit all! We cater to every woodworker, from beginner to pro, with insights and recommendations tailored to your skill level, project needs, and budget. We take the guesswork out of choosing the right tools, whether you're tackling your first crafting a masterpiece for the ages. So grab your chisel, join our community, and let's build something amazing together!
Woodworking Tool Guide wasn't just born, it sprouted from a seed of passion for the craft. What started as a joyful exploration blossomed into a trusted online haven for fellow enthusiasts like you. We pour our love into meticulously chosen review selections, meticulous hands-on testing, and lab-backed insights, all to empower you with reliable, comprehensive information you can build on. So, grab your tools, trust our guidance, and let's build something beautiful together!
Passion-Driven Expertise
Our journey started with a shared love for woodworking. The team behind the Woodworking Tool Guide is comprised of individuals who are not just writers but passionate woodworkers themselves. This shared enthusiasm ensures that our content is crafted with a deep understanding of the craft and an authentic appreciation for quality tools.
Top Tool Guides Online
Woodworking Tool Guide has rapidly ascended to become one of the premier online destinations for tool guidance. Our commitment to excellence and the accuracy of our information has positioned us as a reliable source for both beginners and seasoned woodworkers seeking trustworthy advice on the best tools for their projects.
User-Centric Approach
Our content caters to every woodworker, from rookies just starting out to seasoned pros tackling intricate projects. We tailor our insights and recommendations to your skill level, project needs, and budget, ensuring you find the perfect tools to match your unique woodworking journey. So step into your workshop, grab your tool belt, and let Woodworking Tool Guide be your trusted companion as you craft your masterpieces.
Continuous Support and Innovation
Woodworking is an ever-evolving craft, and so is our commitment to supporting you. We are dedicated to bringing you the latest information on woodworking tools, techniques, and trends. Our team is actively working to expand our content and bring you more valuable insights, ensuring that you stay well-informed in your woodworking adventure.
Hands-On Experience
Ditch the endless research rabbit hole! At Woodworking Tool Guide, we believe in actionable advice, not armchair analysis. We get our hands dirty, putting every tool through its paces in real-world woodworking scenarios. Whether it's the precision of a table saw, the versatility of a router, or the tactile satisfaction of a handplane, we test for performance, durability, and user-friendliness. No more sifting through dry specs – we deliver practical insights you can trust to transform your woodworking dreams into reality.
Woodworking Tool Guide isn't just a review site, it's your trusted companion on the sawdust-filled path to woodworking mastery. Our expert team, led by veteran David Jones, meticulously tests and explains tools in terms you understand. We cut through the jargon, bias, and confusion with real-world insights and honest evaluations. Join our passionate community, where decades of experience, cutting-edge knowledge, and shared love for the craft come together to guide you every step of the way. So grab your chisel, buckle up, and let's embark on this exciting woodworking adventure, together!
Final Word
Undeniably, learning the basics of crown molding cutting can be uncharacteristically challenging. Even so, it is a surprisingly easy task needing you to know cuts made, your angles, not to mention accurate ceiling and room measurements where you are working.
These few cuts, as mentioned above, are among the most familiar cuts you'll perform together with the standard methods to help do this. They are the most practical methods to follow.
Happy Cutting!