Woodworking
Wood Finishes Guide for Beginners

There are lots and lots of different wood finishes to choose from. For the most part what looks good is subjective. Some people prefer a more natural finish whilst others like a dark wood stain on wood that has been smoothed and sanded to perfection.
There’s something to be said for creating with your hands. Our fingertips, after all, have an amazing number of nerves and sensors, allowing us to feel even the slightest imperfection in a surface.
Go to an arts and crafts show, or an antiques mall, or a furniture store, close your eyes, and run your hand over a piece of woodwork. Is it smooth as silk? Fine as glass? Or do you feel small scratches and bumps?
Granted, not all woodwork necessarily merits the time spent on the finest finish you can muster, but for those occasions when you want it, you’ll be happy you learned how.
Keep in mind, this is an article for beginning woodworkers, as well as intermediate woodworkers looking to improve their skills. There are much more advanced techniques involving scrapers, various compounds and generally a great deal more time involved.

Why choose a wood finish instead of leaving the surface raw? Finishes protect the wood; over time, changes in humidity shrink and swell the wood, but finishes can help lessen this effect.
You've bought all the tools; saws, workbenches, clamps and sanders. You've learned the different types of wood jointing techniques and have learned how to measure and cut wood with great accuracy. The finishing touches are the ones that you'll actually see and getting it wrong at the last hurdle may haunt you forever.
A durable finish will keep your piece looking as you intended. Imagine spilling a glass of wine on a table you built lovingly by hand. If you finish it with a nice, durable protective surface, there’s nothing to worry about. However, if you left the wood natural, you now have a permanent purple blemish in the middle of your work.
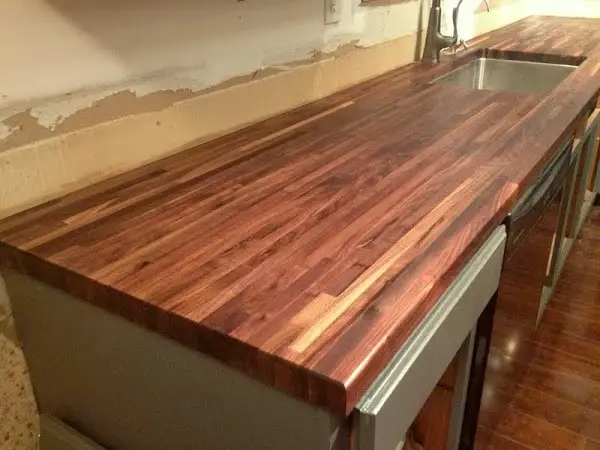
Untreated wood acts like a sponge. Wood finishes are often used to show off the characteristics and grain patterns of that wood. Stains and oils will often complement and enhance the look of different species of wood.
The Science of Sanding
As a quick note on safety, rosewood and many other species can cause lung irritation and even greater medical problems if their sanding dust is inhaled. When in doubt, wear respiratory protection.
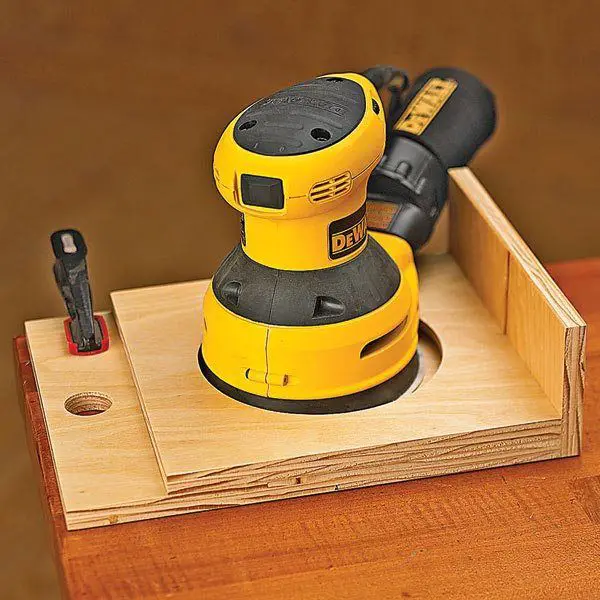
Eye protection is important as well, especially when dealing with a palm sander; the air vents will always find a way to blow dust in your eyes. Whether sanding completely by hand, or with a palm or random orbit sander, start with a coarse grit and work through stages.
Every project needing a smooth finish should have at least three or four different grits used. The number designations for sandpaper stand for the approximate number of abrasive particles per square inch; the more particles, the finer the grit. In the majority of cases, a progression of 80, 160, 240, or any numbers in those general groupings should suffice.
One other option is using sanding sponges, available in a variety of grits. These are best left for projects with curves, or where it’s okay if the edges get slightly rounded. Two of the most commonly used materials from which sandpapers are made are aluminum oxide and garnet, although there are many others out there.
Sand with the grain of the wood – although this may seem like commonsense, any amount of sanding done across the grain is going to leave scratches when the finish is applied. Think about how you want the finished product to turn out – are the edges meant to be crisp and sharp, or do you want to relieve the corners a bit? Is the item meant to look brand new, or is it going to have some “distressing”? (This is the subject for another article.)
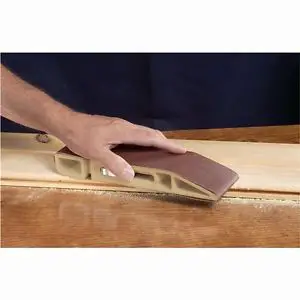
Use a sanding block behind your paper when sanding flat surfaces. This can be a commercially available sanding block, or something as simple as a scrap of wood – the purpose is to press the paper evenly into the surface.
Check your sandpaper once in a while. It will eventually “clog” with sanding dust and be less effective. Slap the paper against your hand or a workbench to remove some of the sanding dust. If too much of the abrasive seems to have worn away, get a fresh piece.
Work your way up through the grits. The coarsest paper is for removing material, saw marks and tooling marks; intermediate grits remove scratches and sanding marks from the previous operations; the finer sandpaper will put a near-finish smoothness on the surface of the wood.
I say near-finish, because we still have a final step in the sanding process. Using a spray bottle of plain water, mist the entire surface of the work-piece. It doesn’t need to be saturated, just enough to get the surface wet to the touch.
Let the piece completely dry, and then run your hand over it. It’s rough again! All that careful work for nothing, right? Wrong. The water swells and raises the wood’s grain slightly, and when you use the fine grit paper on it again now, it will knock down the raised grain. This can be repeated more than once if necessary before finishing.
Just think how upset you’d be if you had painted or stained without doing the final grain raising with water! Take your time, do it right, and you’ll be pleased with the results. Now, we’re ready to move to the next phase of the process.
Wood Finishes
Entire volumes could be – and have been – written regarding specific types of finishes. In this case, without going into brand names, I’ll discuss a few of the most general types of wood finish available at almost any home center. Afterward, we’ll take a more in-depth look at how to actually apply these products to your work piece.
As stated above, we need to take a moment to regard safety precautions. Most acrylic paints these days contain few, if any, VOCs and harmful fumes. On the other hand, many other products, either oil-based,or with certain drying agents, can put off dangerous fumes. Please pay attention to all safety advisories on the products’ containers, including using in well-ventilated areas, with supplementary respiratory protection
Wet Process Wood Finishes – The Products
Paints are available in a range of surface types, from matte and eggshell, to the semi-gloss and full gloss. This is strictly a personal preference based on your project. For purposes of this writing, we are going to stick with latex/acrylic paints, as they are water-based, with a much faster drying and curing time.
Oil-based paints, while great in some applications, have generally a longer drying time, often are filled with volatile chemicals (VOCs), and require some sort of solvent such as mineral spirits for cleanup.

Stains and dyes are transparent colorants that allow the grain to show though and enhance the look of the wood, but offer no protection to the surface. They come in a wide variety of shades and tints, and even in vivid colors. Generally speaking, the more coats of stain applied, the deeper the tone. Depending on the manufacturer, these products have varying degrees of VOCs and solvents. Since they are not wood preservatives, stains and dyes must be used in combination with some form of surface protectant, a couple of which will be discussed below.
Polyurethanes, both oil-based and water-based are widely known as excellent wood protectants. Since the water-based variety is slightly less tolerant to high extremities of heat, it shouldn’t be used in applications where it might have hot dishes or mugs placed on it. Both types are versatile in their uses, and can even be applied over paint as an additional preservative. Keep in mind that polyurethane will lend a slight amber hue to most woods, as well as to lighter colors of paint.
Varnishes are essentially resins dissolved in a liquid, and form a hard,durable surface when cured. One of the most common types of this product, known as spar varnish, is perfect for outdoor projects, especially in locations around water.
Stain/Protectant combinations are very common today, and afford the user a bit faster finish, since there is no need to apply the sealer, then the stain,and then two or three coats of wood preservative. One of the most common of these combinations is stain mixed with polyurethane.
There are two major types of oil finishes I will mention at the moment, since oil is somewhat more difficult to work with. Tung oil and boiled linseed oil are both traditional means of preserving wood, but take some practice in getting used to their application. Be sure to use boiled linseed oil, as raw linseed oil will take weeks to fully cure.
There are many products sold as “wiping varnishes” that are in reality an oil mixed with different metallic dryers or other agents. Again, use a sample board for practice.
Laying it Down
First, it is advisable to start with a coat of sanding sealer. In painted applications, this primes the wood, and helps make the paint adhere better to the surface.
With oil-based wood finishes, sanding sealer helps provide more even absorption of the finish solution, preventing blotches and uneven coloration. This is a common problem with many species of wood, including pine and cherry.
With all finishes, it is best to make a test board, a sample piece made out of the same material, sanded with the same grits of sandpaper.
The rule of thumb for applying the finish product is to use slow, even strokes of the brush, keeping a wet edge at all times. If the edge of the last strip applied by brush is allowed to dry out even partially, it could leave small ridges in the finished surface where the brush strokes overlap.
Brushing too quickly can cause more air bubbles. While it is normal to see some bubbles in the wet finish, it is better to stir oil-based products, especially varnish, instead of shaking them.
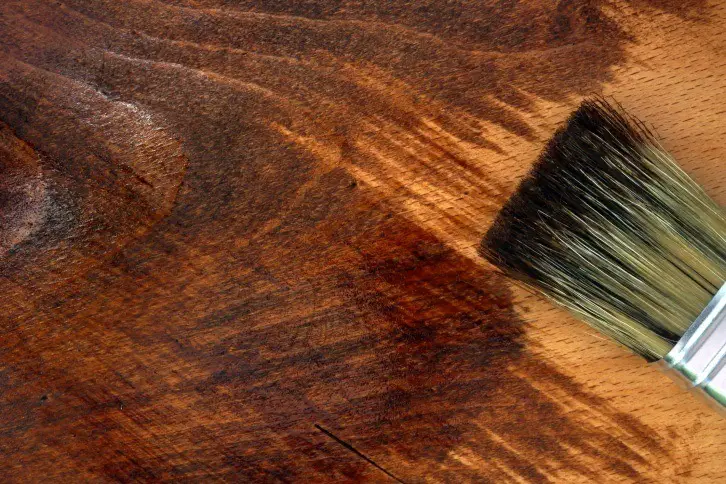
Staining wooden surface
Allow the first coat to dry completely, then go over it with ultra-fine sandpaper, or better yet, 0000 grade steel wool. This will help to smooth out any bubbles or imperfections. Be careful not to sand too deeply, nor get down to bare wood. A second coat should suffice on most surfaces. Buildup of too many coats may cause the loss of detail in some woodworking projects.
Wet Wood Finishes – A Note about Brushes
The generally accepted convention is to use synthetic (usually nylon) bristle brushes when using acrylic paints and finishes.
Natural bristle (also called China bristle) brushes are best when applying oil-based wood finishes, including oil-based paints.
The best advice when learning how to use a new finish is to test, test, test. Take a few pieces of sample wood. Sand them with different grades of sand paper until you find what works best.
Then apply the finish. For the different pieces of test wood apply a different number of coats. Apply sealer to some and not to others. And sand in between coats and not others.
This experimentation means that any mistakes you make will not be on your finished project only on a few pieces of off cut wood.
When you find what you like then start the same process on the least visible part of your project. See how it looks and then if you like it continue on to the rest of it.
Over time you will learn how to get the best wood finish for each scenario. By experimenting like this you can greatly speed up your learning process and reduce the amount of mistakes on your projects as you finish them.
Now that we’ve figured out the mysteries to a good wood finish, what are you going to build next? Challenge yourself to improve your skills, and really pull out all the stops on that finish. If you don’t love the results, sand it down a little and keep on trying.